The Challenge
In recent years, I have mainly used EVE-ng and Cisco CML for my virtual labs, as my employer provided me with the necessary resources and systems. Ultimately, however, you are always dependent on their accessibility and availability, which cannot always be guaranteed in every situation. In addition, these resources are not exclusively available to you – so if colleagues are running larger labs for their projects, you may be left out for the time being.
That’s why I was looking for a simple, local alternative that would be available at any time and could be used ad hoc – whether I’m working from home, traveling by train, or attending a customer meeting.
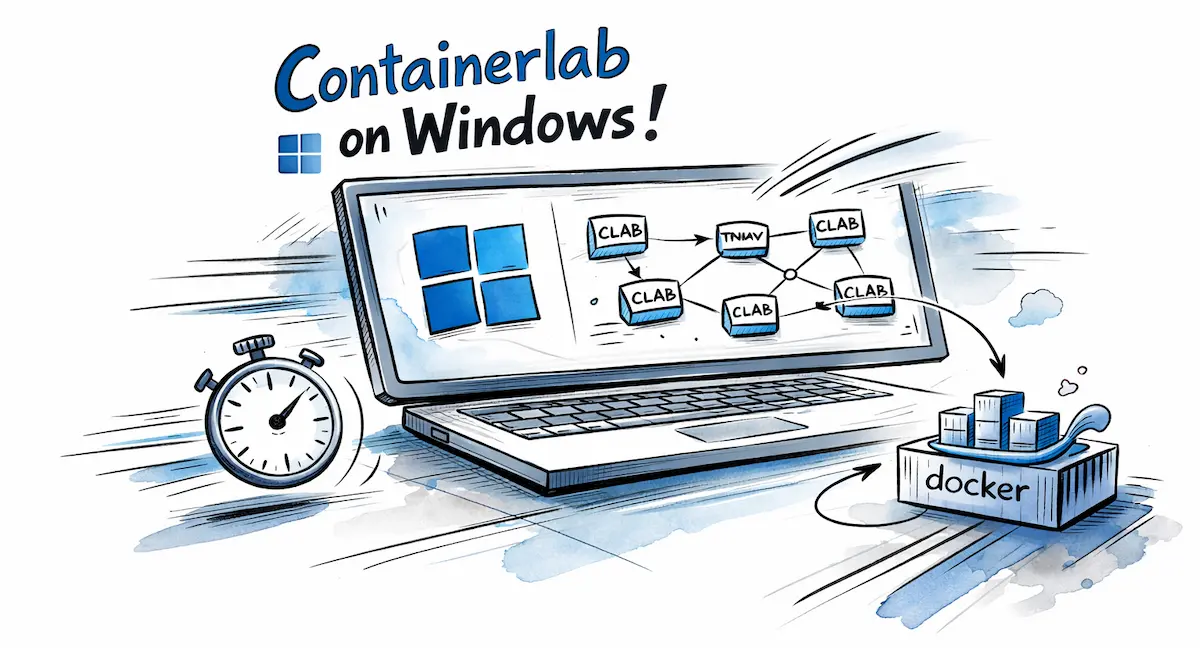
This post is therefore primarily aimed at those who want to run Labs quickly and easily directly on their laptop or desktop. Since I use Windows both privately and professionally, the content refers to Windows systems as a starting point.
The Solution
I have therefore been following Containerlab for several years now—a tool that makes it easy to define and use container-based labs according to infrastructure-as-code principles. I first became aware of Containerlab in 2021.
At the start of the project, which was developed by Nokia, the focus was understandably primarily on support for Nokia’s own container-based NOS Nokia SR Linux. Over time, support for other manufacturers has been expanded and, in addition to purely containerized nodes, “classic” VM-based nodes can now also be integrated into the labs (thanks to vrnetlab integration), which are also used in EVE-ng, CML, and GNS3, for example. In addition, the specially developed VS Code Extension has provided many useful enhancements in terms of user interface and experience, which make it much easier to get started and switch over.
I would like to briefly summarize here how easy the required setup is on a conventional Windows 11 system. The goal will be to run a small and simple Arista lab with two nodes on a local laptop.
So let’s get started…
The Plan
In principle, Containerlab requires a Linux-based system running Docker. Although this may seem to contradict the actual purpose of this post, it is not a showstopper. To meet these requirements, we use WSL2 (Windows Subsystem for Linux), which is basically a small Linux VM on Windows.
The easiest way to use Containerlab on Windows is to use the specially developed Containerlab WSL distribution, which comes with all the necessary packages, tools, and, of course, Containerlab itself pre-installed.
As a development environment or “front end,” we will use Visual Studio Code including the Containerlab Extension to take advantage of a few additional convenience features.
Finally, we just need to download the necessary Arista cEOS Lab containers from the manufacturer and integrate them. After that, the topology can be defined with a few lines in YAML format and started via CLI.
Step 1 – The basics: VS Code and WSL2
First, we need to make sure that the necessary basics are installed with Visual Studio Code and WSL2. If this is already the case, you can skip this step.
VS Code can be installed via the Microsoft Store. Alternatively, you can download and install it manually via the following URL: https://code.visualstudio.com/
WSL2 is installed or activated in Windows 11 with the following Powershell command:
wsl --install
Note
Under Windows 10, the WSL setup is a little more complex. Details can be found in the official Containerlab documentation.
The Powershell command wsl -v can be used for verification:
PS C:\> wsl -v
WSL version: 2.6.3.0
Kernel version: 6.6.87.2-1
WSLg version: 1.0.71
MSRDC version: 1.2.6353
Direct3D version: 1.611.1-81528511
DXCore version: 10.0.26100.1-240331-1435.ge-release
Windows version: 10.0.26200.7623
Tip
The WSL version should be at least 2.4.4.0.
Step 2 - The All-in-One Distribution: WSL Containerlab
In the next step, the latest version of the Containerlab WSL distribution can be downloaded from the following link: https://github.com/srl-labs/wsl-containerlab/releases/latest
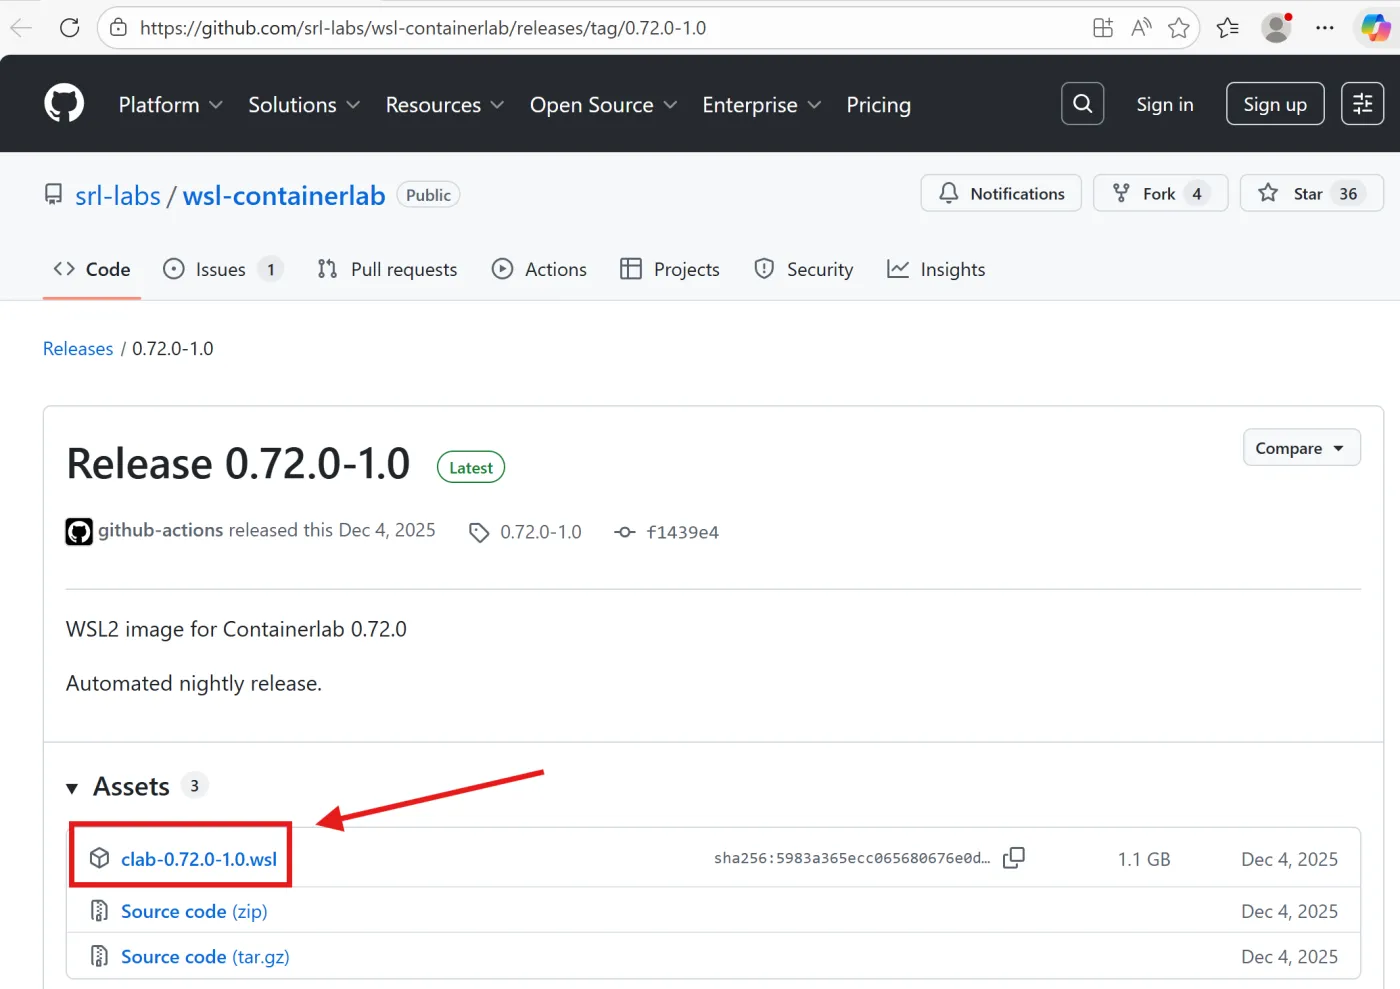
After downloading, the Containerlab WSL distribution can be easily installed and activated by double-clicking the .wsl file. During the installation process, you can select various settings regarding the desired shell variant (zsh / bash / bash with 2-line prompt) and additional fonts. These can be selected according to your preferences, but do not affect functionality.
Installing: C:\clab-0.72.0-1.0.wsl
Distribution successfully installed. It can be launched via 'wsl.exe -d Containerlab'
Launching Containerlab...
Welcome to Containerlab's WSL distribution

Applying system kernel settings for inotify...
System kernel settings applied.
1) zsh
2) bash with two-line prompt
3) bash (default WSL prompt)


Please select which shell you'd like to use: 2

bash with two-line prompt selected.
Would you like to install FiraCode Nerd Font? (y/N) N
Installing Containerlab completions for BASH...

SSH keys successfully copied. You can SSH into Containerlab WSL passwordless with: 'ssh clab@localhost -p 2222' (Ensure Containerlab WSL is open)

[*]─[Laptop]─[/mnt/c]
└──>
After installation, the status can be verified with the Powershell command wsl -l -v:
PS C:\> wsl -l -v
  NAME            STATE           VERSION
* Ubuntu-24.04    Stopped         2
  Containerlab    Running         2
Step 3 – Preparing the development environment
As described at the beginning, VS Code will serve as the development environment or “front end.” So, at this point, we start VS Code and open a new remote window using the Open a Remote Window button (with the ‘><’ symbol) in the lower left corner, then select Connect to WSL using Distro… and select the Containerlab distribution.
Note
If this is not possible as described, you may need to install the WSL extension via the Extension Manager in VS Code.
 VS Code will then open a new window that runs directly in Containerlab WSL. The button at the bottom left makes this clear: WSL: Containerlab.
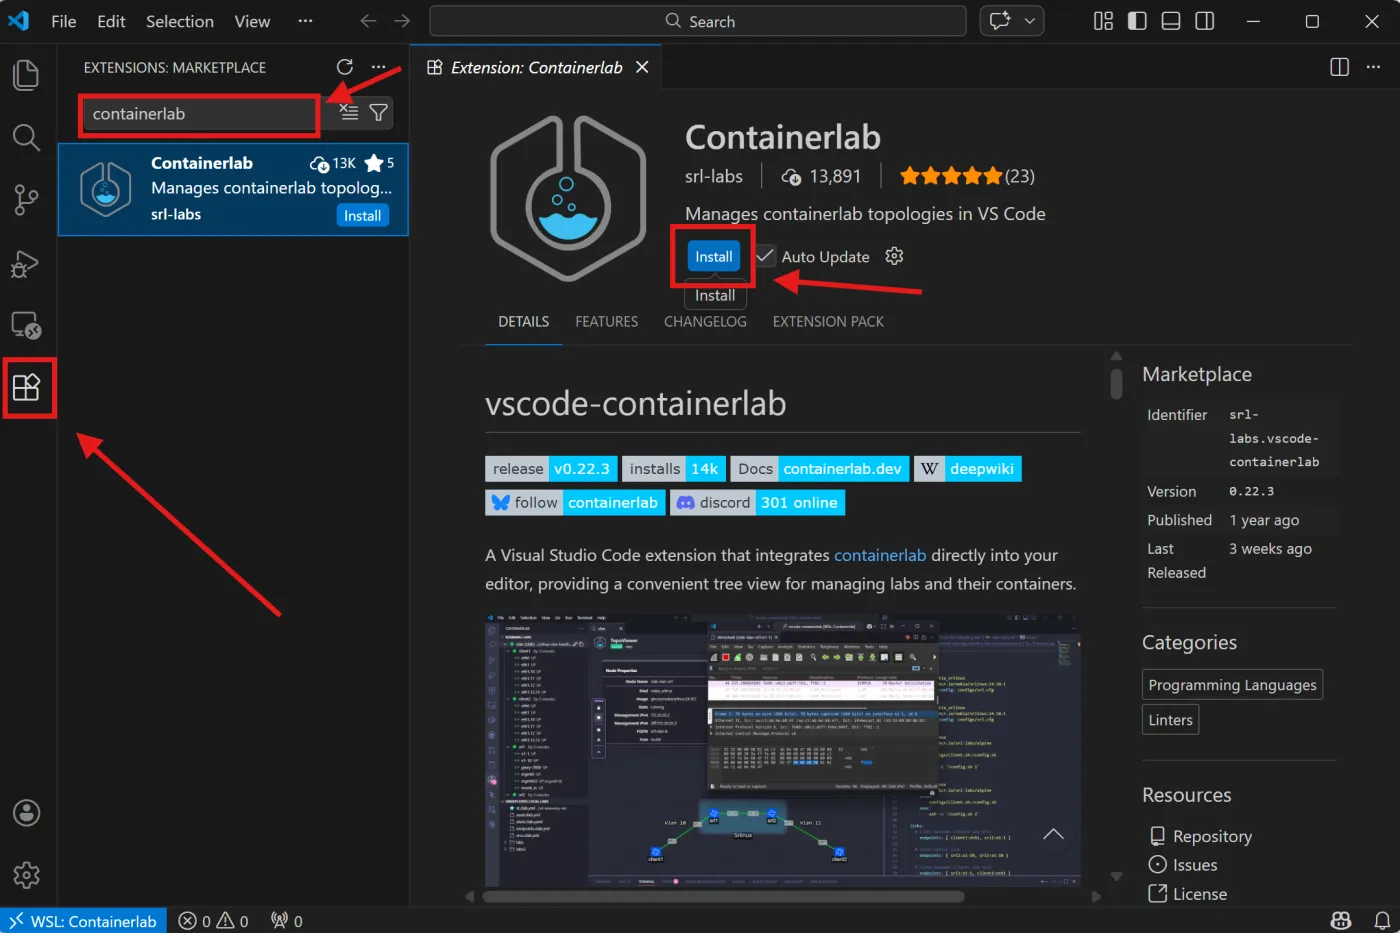
Before opening a new folder, you should install the official Containerlab Extension via the VS Code Extension Manager. This will then be available for VS Code sessions within WSL.
Step 4 – Integrating the Arista cEOS Lab Node
Containerlab does not come with any pre-installed container images or other nodes. If the required images cannot be loaded dynamically from a container registry, they must be obtained officially from the respective manufacturer websites, provided that the necessary permissions are available.
So we switch back briefly from our VS Code session in WSL to the Windows host to open the browser. The desired version of Arista cEOS Lab can be downloaded from the Arista website under Software Download (account required) – in this example, I am using the file cEOS64-lab-4.34.4M.tar.xz
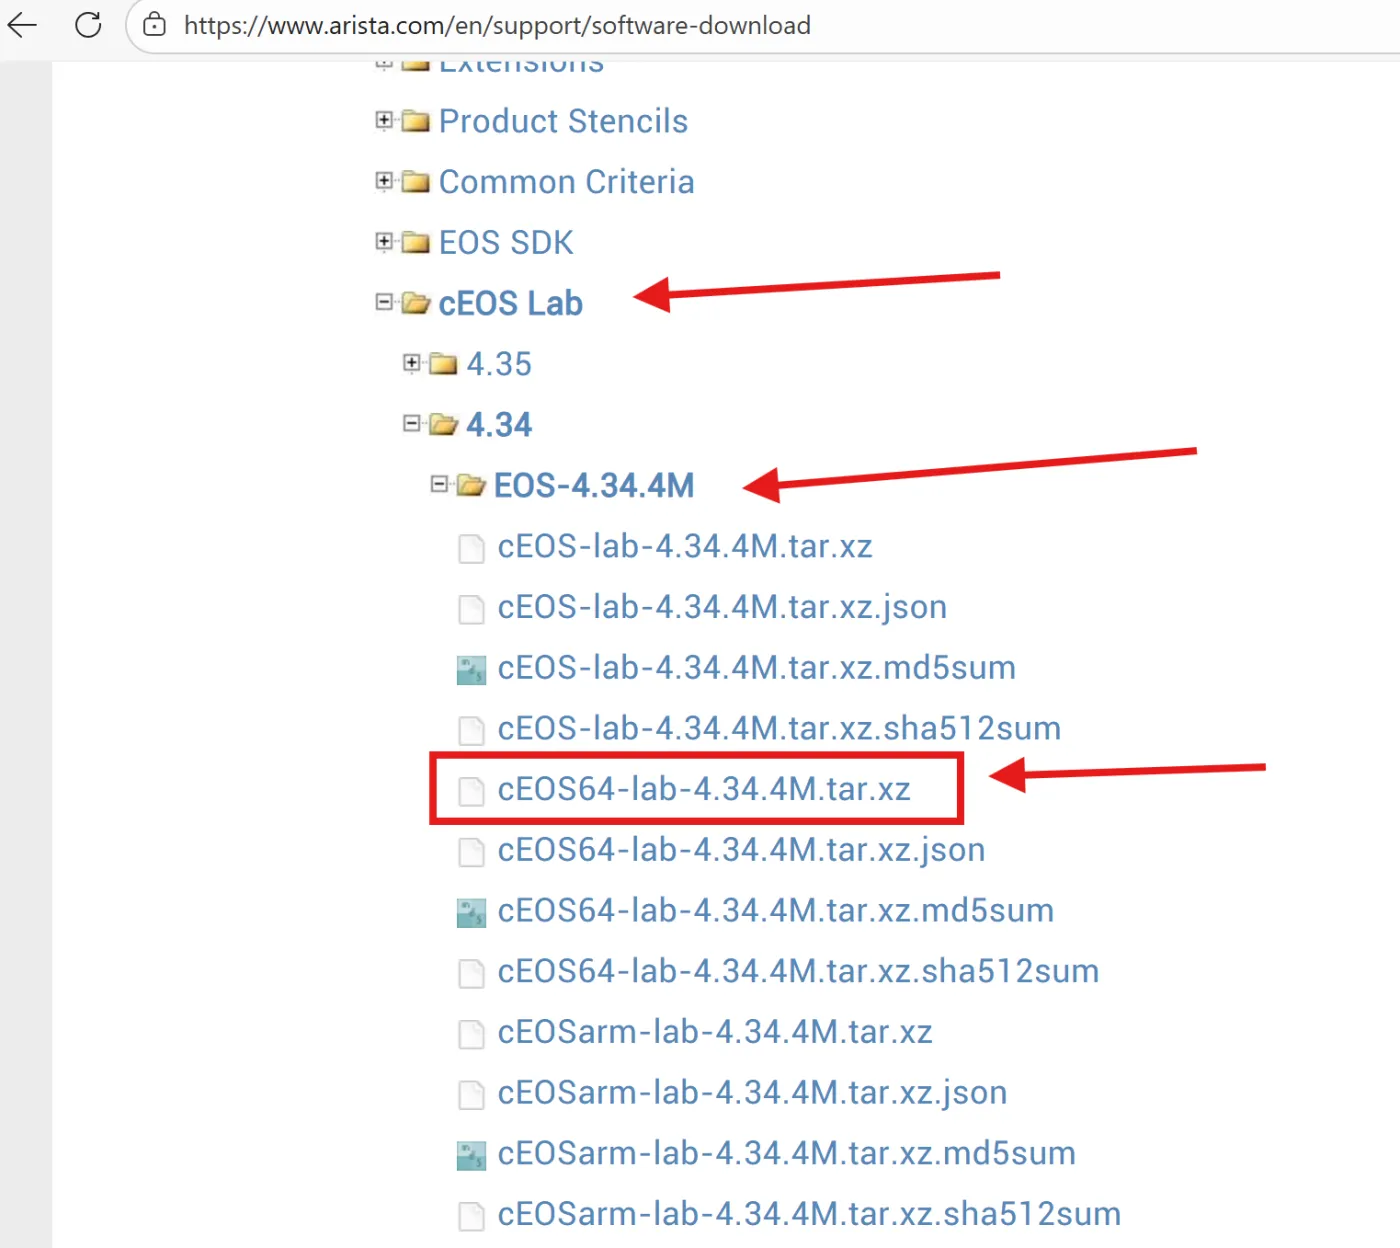
The image is approximately 600MB in size and can then be copied to the file system of the Containerlab WSL instance using Windows Explorer: Linux > Containerlab > home > clab
From there, we switch back to the VS Code session in WSL. We open a terminal under View > Terminal and land on the shell CLI in the home directory of the user clab, where we just copied the image file.
With the command docker import cEOS64-lab-4.34.4M.tar ceos:4.34.4M, the image is integrated into the local Docker environment and can then be used.
Note
Depending on your system performance, the import process may take up to a few minutes. Please be patient.
To verify that the import process was successful, you can use the docker images command:
[*]─[LAPTOP]─[~]
└──> docker images
REPOSITORY   TAG       IMAGE ID       CREATED          SIZE
ceos         4.34.4M   1fcc82be442a   20 seconds ago   2.54GB
Step 5 – Defining the topology and starting the lab
Now all the necessary prerequisites are in place to define and use the lab. In the current Bash session, we create a new folder for our lab files with mkdir labs and open it in VS Code as our working environment.
A simple lab topology with two cEOS nodes, each connected to the other via the eth1 port, can be set up in just a few lines in YAML format:
name: cEOS-lab

topology:
  kinds:
    arista_ceos:
      image: ceos:4.34.4M
  nodes:
    node1:
      kind: arista_ceos
    node2:
      kind: arista_ceos
  links:
  - endpoints: [node1:eth1, node2:eth1]
Note
When copying and pasting, make sure that the indentations of the individual parameters are YAML-compliant. Otherwise, your lab will not start.
Save the file under the name cEOS-lab.clab.yml in the current folder so that you can start it afterwards with the command clab deploy -t cEOS-lab.clab.yml. Alternatively, you can also start the lab using the functions of the Containerlab Extension.
The output should look something like this:
[*]─[LAPTOP]─[~/labs]
└──> clab deploy -t cEOS-lab.clab.yml
09:13:00 INFO Containerlab started version=0.72.0
09:13:00 INFO Parsing & checking topology file=cEOS-lab.clab.yml
09:13:00 INFO Creating docker network name=clab IPv4 subnet=172.20.20.0/24 IPv6 subnet=3fff:172:20:20::/64 MTU=0
09:13:00 INFO Creating lab directory path=/home/clab/labs/clab-cEOS-lab
09:13:00 INFO Creating container name=node1
09:13:00 INFO Creating container name=node2
09:13:01 INFO Running postdeploy actions for Arista cEOS 'node1' node
09:13:01 INFO Created link: node1:eth1 ▪┄┄▪ node2:eth1
09:13:01 INFO Running postdeploy actions for Arista cEOS 'node2' node
09:13:59 INFO Adding host entries path=/etc/hosts
09:13:59 INFO Adding SSH config for nodes path=/etc/ssh/ssh_config.d/clab-cEOS-lab.conf
╭─────────────────────┬──────────────┬─────────┬───────────────────╮
│         Name        │  Kind/Image  │  State  │   IPv4/6 Address  │
├─────────────────────┼──────────────┼─────────┼───────────────────┤
│ clab-cEOS-lab-node1 │ arista_ceos  │ running │ 172.20.20.3       │
│                     │ ceos:4.34.4M │         │ 3fff:172:20:20::3 │
├─────────────────────┼──────────────┼─────────┼───────────────────┤
│ clab-cEOS-lab-node2 │ arista_ceos  │ running │ 172.20.20.2       │
│                     │ ceos:4.34.4M │         │ 3fff:172:20:20::2 │
╰─────────────────────┴──────────────┴─────────┴───────────────────╯
At the end of the deployment process, a summary of the deployed nodes, including their IPv4/v6 addresses configured on the management interfaces (eth0), is displayed.
Step 6 - At the destination: Using the lab
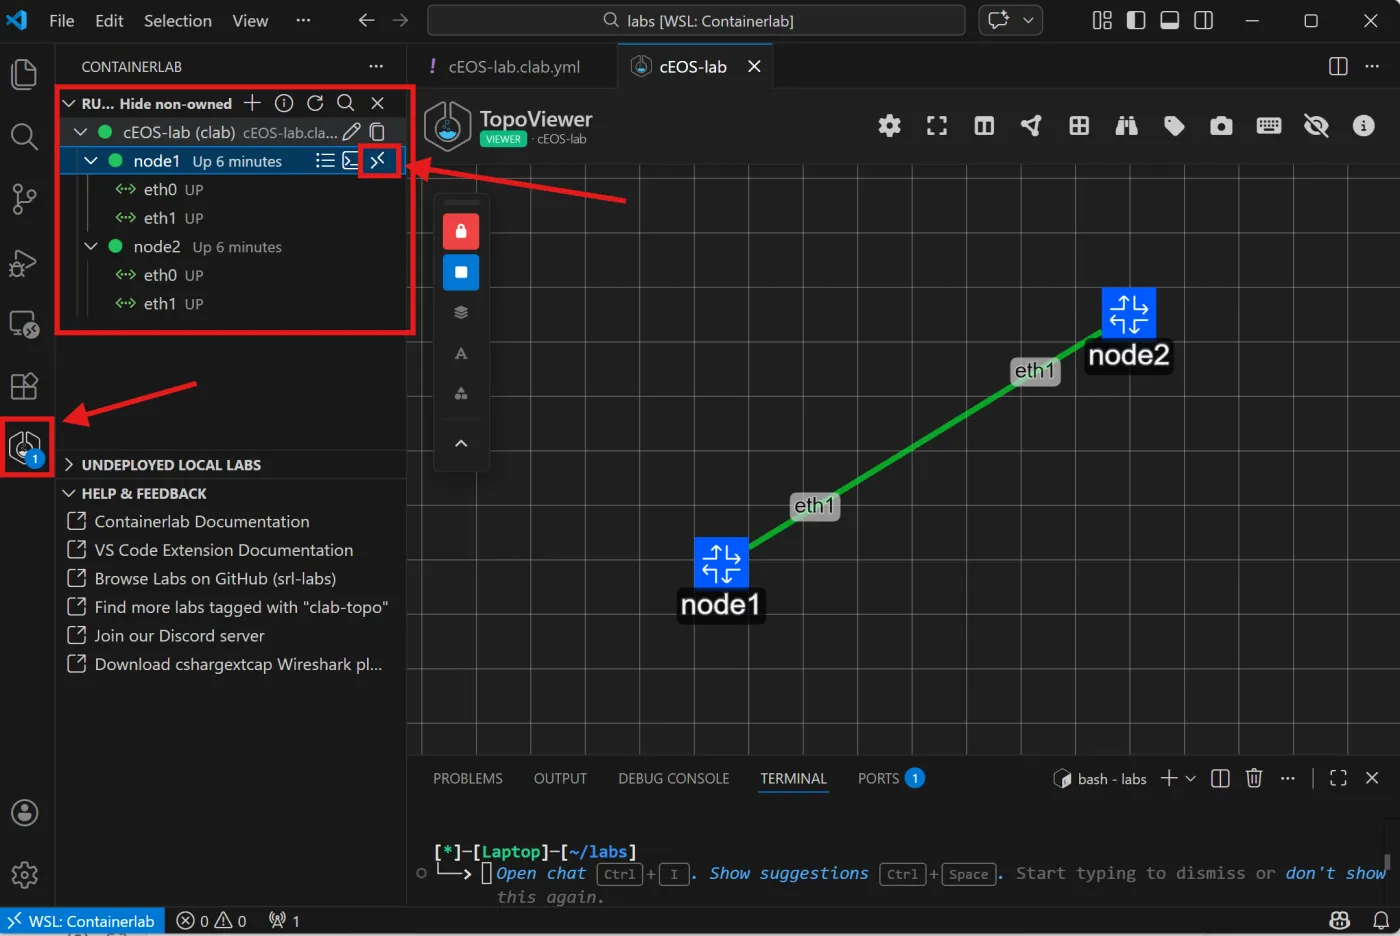
At this point, the lab is ready to use. You can connect to the individual nodes via SSH, for example using the Containerlab Extension (via the menu bar on the left), to make configurations. In addition, the extension also visualizes the topology and provides an overview of all interfaces, including their status and the option to create packet captures (using Edgeshark integration).
[*]─[LAPTOP]─[~/labs]
└──> ssh admin@clab-cEOS-lab-node1
Warning: Permanently added 'clab-ceos-lab-node1' (ED25519) to the list of known hosts.
(admin@clab-ceos-lab-node1) Password:
Last login: Sun Feb  8 10:09:05 2026 from 3fff:172:20:20::1
node1>en
node1#conf t
node1(config)#interface Ethernet 1
node1(config-if-Et1)#no switchport
node1(config-if-Et1)#ip address 10.1.1.1/30
node1(config-if-Et1)#
Tip
The default credentials for Arista cEOS are admin/admin.
When the lab is no longer needed, it can be shut down again with the command clab destroy -t cEOS-lab.clab.yml.
[*]─[LAPTOP]─[~/labs]
└──> clab destroy -t cEOS-lab.clab.yml
11:00:57 INFO Parsing & checking topology file=cEOS-lab.clab.yml
11:00:57 INFO Parsing & checking topology file=cEOS-lab.clab.yml
11:00:57 INFO Destroying lab name=cEOS-lab
11:00:58 INFO Removed container name=clab-cEOS-lab-node1
11:00:59 INFO Removed container name=clab-cEOS-lab-node2
11:00:59 INFO Removing host entries path=/etc/hosts
11:00:59 INFO Removing SSH config path=/etc/ssh/ssh_config.d/clab-cEOS-lab.conf
Note
With Arista cEOS, the node configuration is automatically saved in the respective lab folder for the individual nodes (e.g., clab-cEOS-lab/node1/flash/startup-config) when the configuration is saved on the cEOS CLI using the write memory command. This configuration is then loaded back into the container during the next deployment.
Alternatively, the currently running configurations for all nodes can be saved using the container lab command containerlab save. This is particularly useful for larger labs.
Conclusion
You now have a small local test environment for simple lab use cases that you can start directly from your Windows system at any time. The entire setup, including downloads, takes about 15 minutes (depending on your internet bandwidth) and can be completed with just a few clicks and commands.
Even if this setup is not necessarily the right solution for all lab requirements, it is primarily intended as an alternative that is worth trying out at least once. It also illustrates the potential of container labs and container-based labs, even if not all manufacturers consistently provide corresponding containerized nodes yet.
Fun Fact
I have successfully tested the entire procedure on my 2019 Surface Pro 6 with 8 GB RAM and Core i5-8250U CPU, including both cEOS nodes 🤓.
However, I will discuss how to overcome the limitations of the local system without relying on lavishly equipped server hardware in a later post.